Friday, June 29, 2012

Wine Bottle Koozy from Corks

Made a cork wine bottle koozy.


I drilled the corks and used some basic beadwork stitches to create it. To drill the corks, I held them with clamps that look like large clothes pins while I drilled the hole the long way through the cork. To make my needle, I used a 2" piece of floral wire,crimped at the end to hold the hemp string in place. Next the "beading." First I started with the bugle bead chain. After I chained the proper number of corks, I chained them into a loop.  After I have my first row, I continued with the brick stitch (start at step 7 in the instructions) until I had enough rows. Sounds easy, but was a little more difficult than I anticipated, but overall I think the koozy is cool!

Sunday, June 24, 2012

Solar Suncatcher

I couldn't let my Solar rose be. I just had to turn it into something. Based on the materials I had, I decided to build a floral suncatcher. I wanted to continue using milk jugs because I love the way they look in the sunlight. I used plexiglass as my base. So here it is.

And here is how it looks all lit up.


It's meant to hang in the window to catch light all day and then light up at night. After making this one for my sun room, I wish I had planned it for a bathroom instead. It would make a great privacy screen and night light all at once. However, until I find a better alternative to hot glue, I won't be making any more. See my post on hot glue for more explanations.

Rethinking Hot Glue

I confess, I'm a late comer to the love affair with hot glue. Despite an early start to crafts, I didn't own my very own glue gun until a year ago. It was a hand me down and it blew up. There was fire and cursing, but enough luck involved so I wasn't hurt. The near death experience aside, I really did fall in love with hot glue. That lasted all of a week. Now I am not so sure. Here are my complaints. First, it turned yellow in the sun, so the window hanging project now has a yellow goobers all over. Second, it loosened up in the sunlight and some of the pieces popped loose. I had plans to use it for some outdoor winter crafts, but I don't know how it would do with the cold. Third, the strings drive me nuts. They are like cobwebs everywhere.
However, I don't know of anything that will work better. Hmmm.... Any ideas?

Rose Solar Lights


I made a solar rose using milk jugs. I am pretty stoked about it. Here's how to make your own.
Supplies: Cheap Solar light, Tape, White Spray Paint (not Krylon), Scissors, 1-2 cleaned milk jugs, Hot glue gun, Spare Hot glue gun (in case the first one explodes in a fiery death), Glue sticks, wooden skewer or chopstick, and extra fingers to replace the burned ones. 

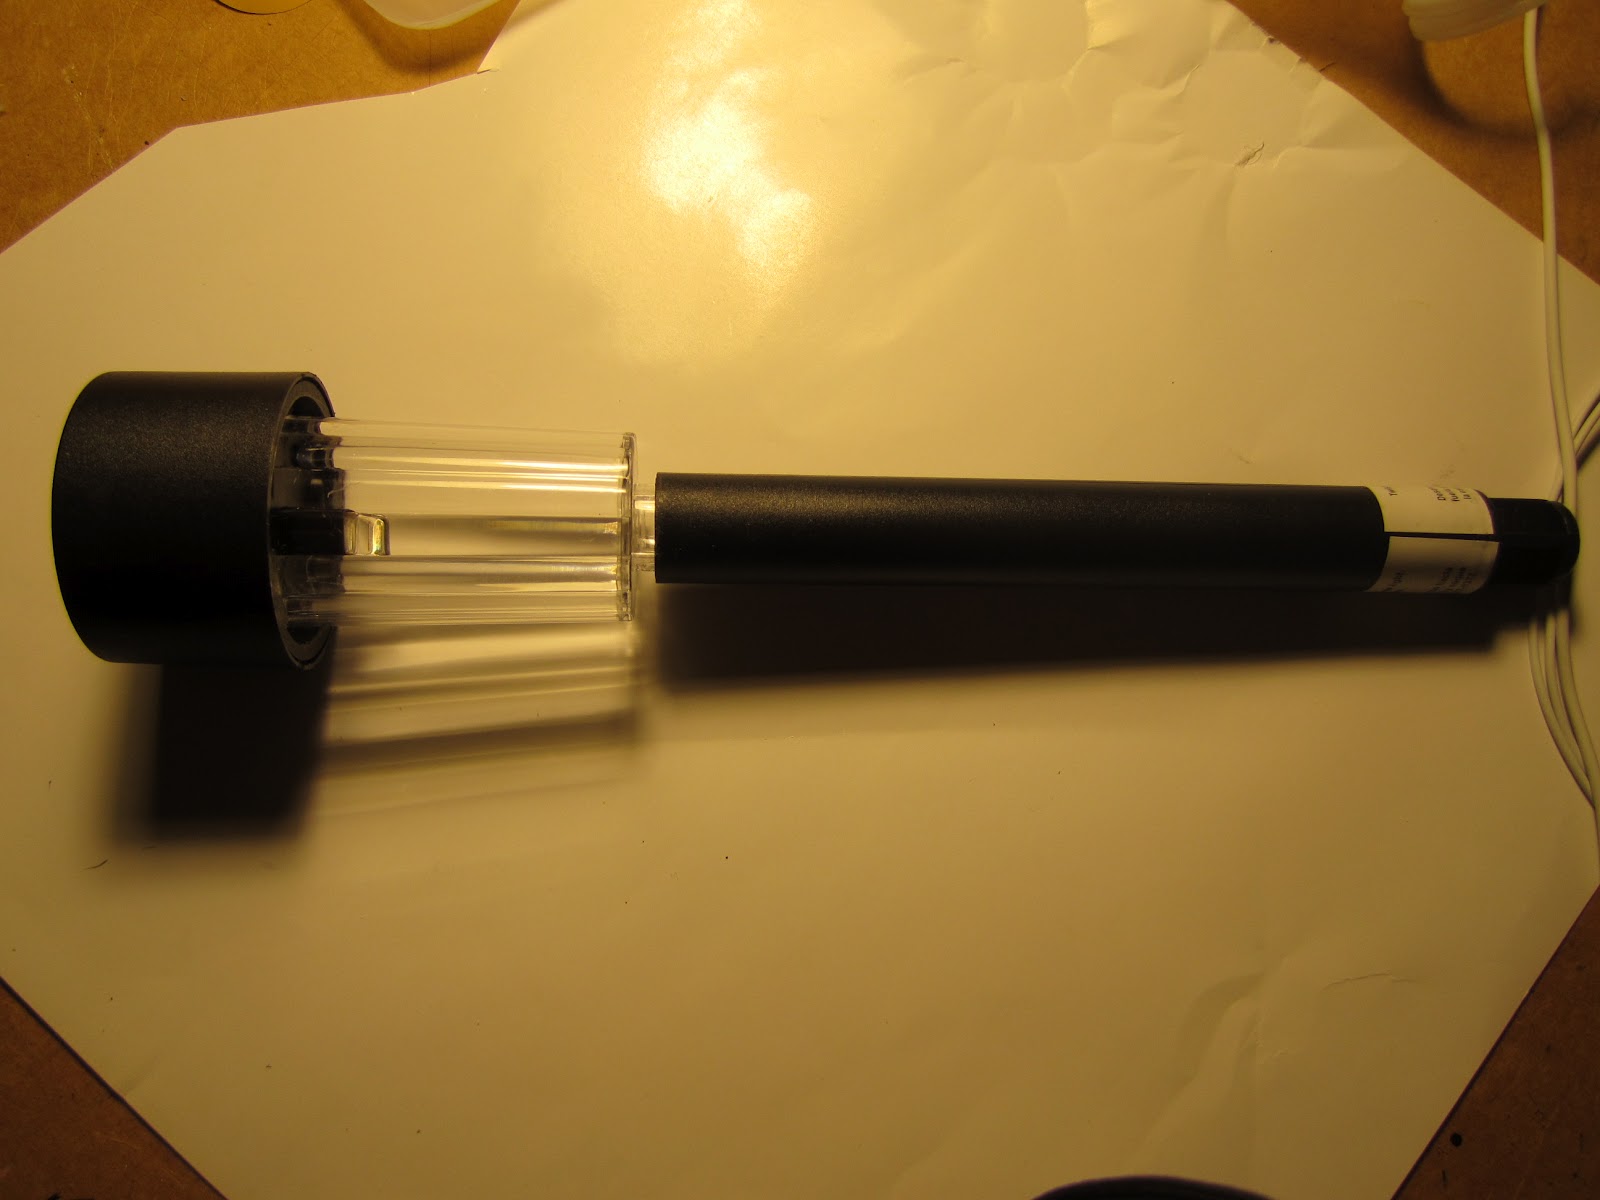
 Disassemble the light. Keep the stake for gardening or other craft projects. For this project you only need the part that houses the light.
 Cover the light bulb and the solar panel with tape. Spray paint until coated in white. I used Krylon white and it came out a little tacky. Hopefully you will have better luck with a different brand.

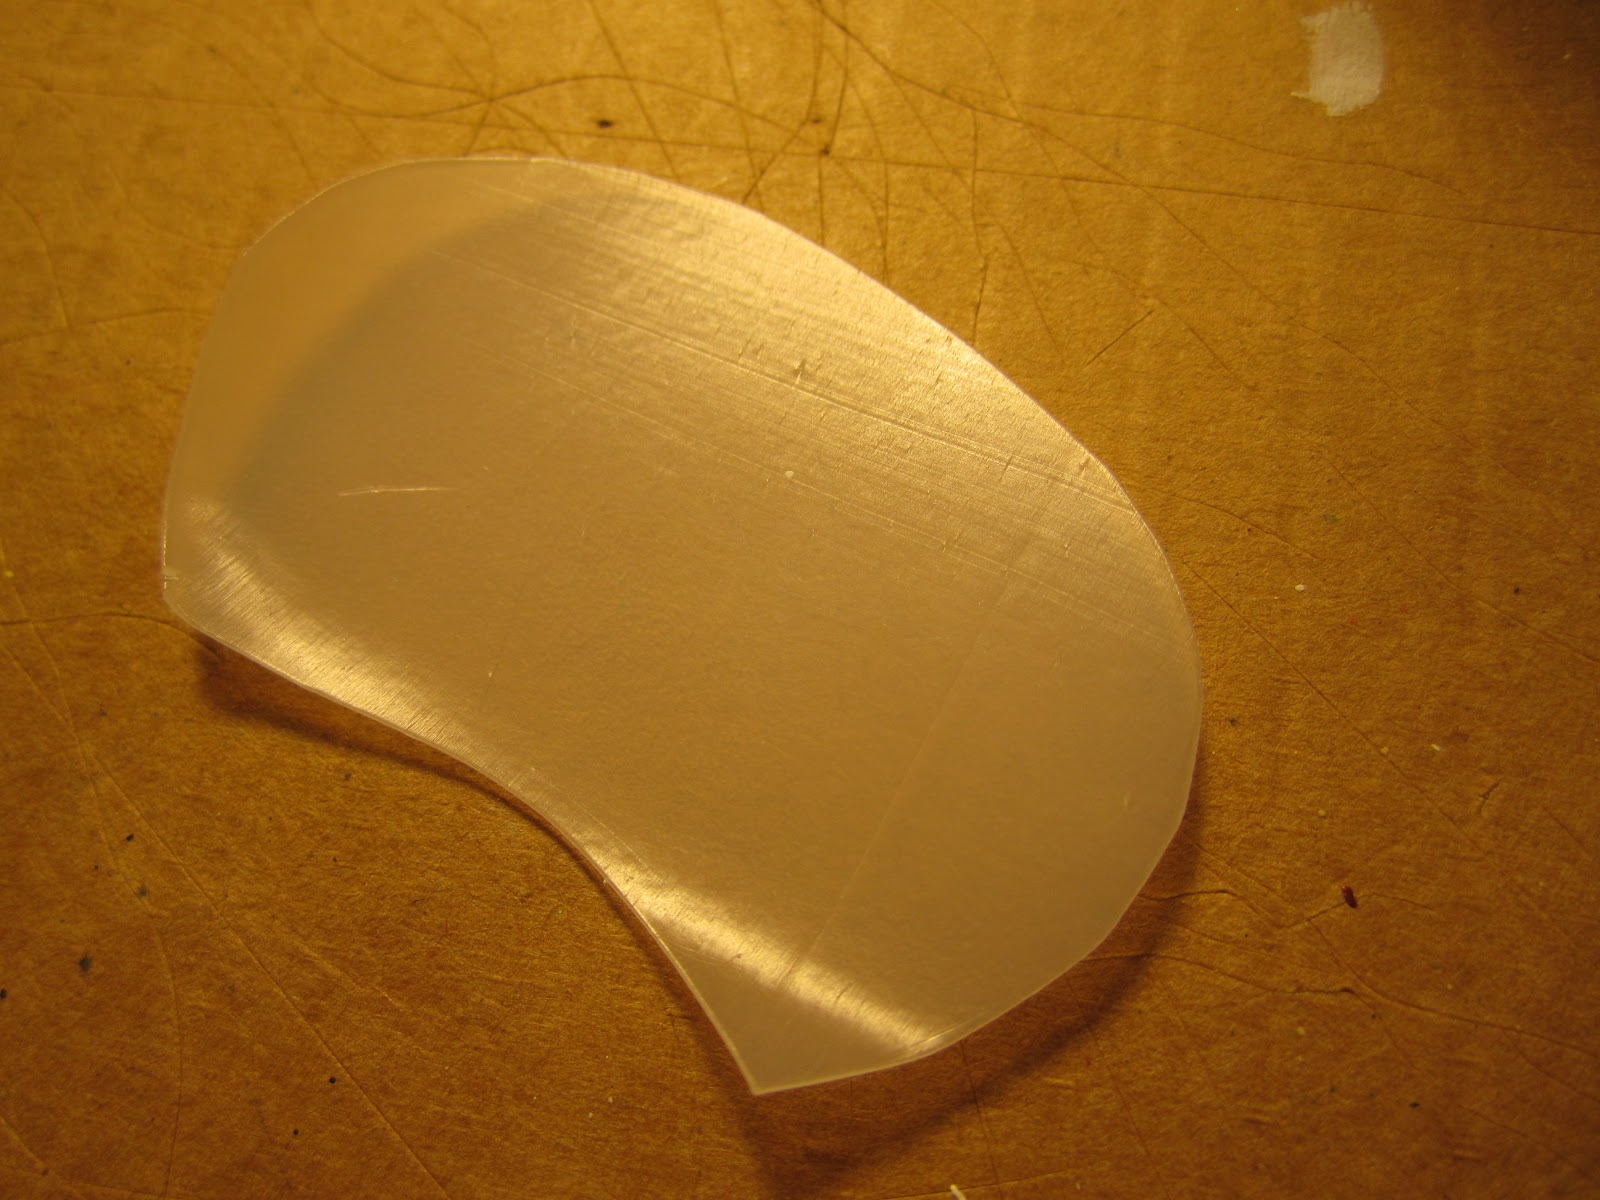
For the very center of the rose I used a piece of the handle from a 1/2 gallon and started gluing petals from there. Use the skewer to press the petals in place until the glue hardens so you don't burn your fingers.


 If your glue starts smoking and the glue comes out yellow, please throw it out before it explodes.*

*Note that the glue stick in the barrel has turned black.
*In other news, I now know that when facing a ball of fire, I do not scream like a baby, but curse like a sailor. Hopefully my toddler never learns this fact about me.


Tip 1 - Use a sharp pencil to etch your line into the milk jug and then you won't have to worry about the line of say a marker showing on your petals.

Tip 1 - It helps to have a curve on attachment point of the petal. They sit in place better.

Tip 2 - The inner petals should be smaller, but the outer petals can all be cut from the same pattern.
And here is your finished rose.


Now, I have some ideas about what I could do with my rose. The important thing is to be aware of how light will charge your rose. The solar panel has to get some light.

1) Flip it over during the day to charge and then use it like a tea light at night. 
2) Cut a loop (see below) to glue around the light and hang it in a window, sun room or on a tree outside for a floating, glowing rose. 
3) Make more and more and more of them to great a hanging, spiraling rose chandelier! 

If you have ideas for where to put them, please comment below. Happy Up-cycling!

Solar Lanterns

New crafty project - Solar lanterns from mustard jars and solar yard lights.